WordPress
Use the One-click deployment method to install and configure WordPress on your server automatically. After the application is created, manage the site from the WordPress admin dashboard or from WP Toolkit in the ServerAvatar application panel when you have the WordPress Toolkit add-on.
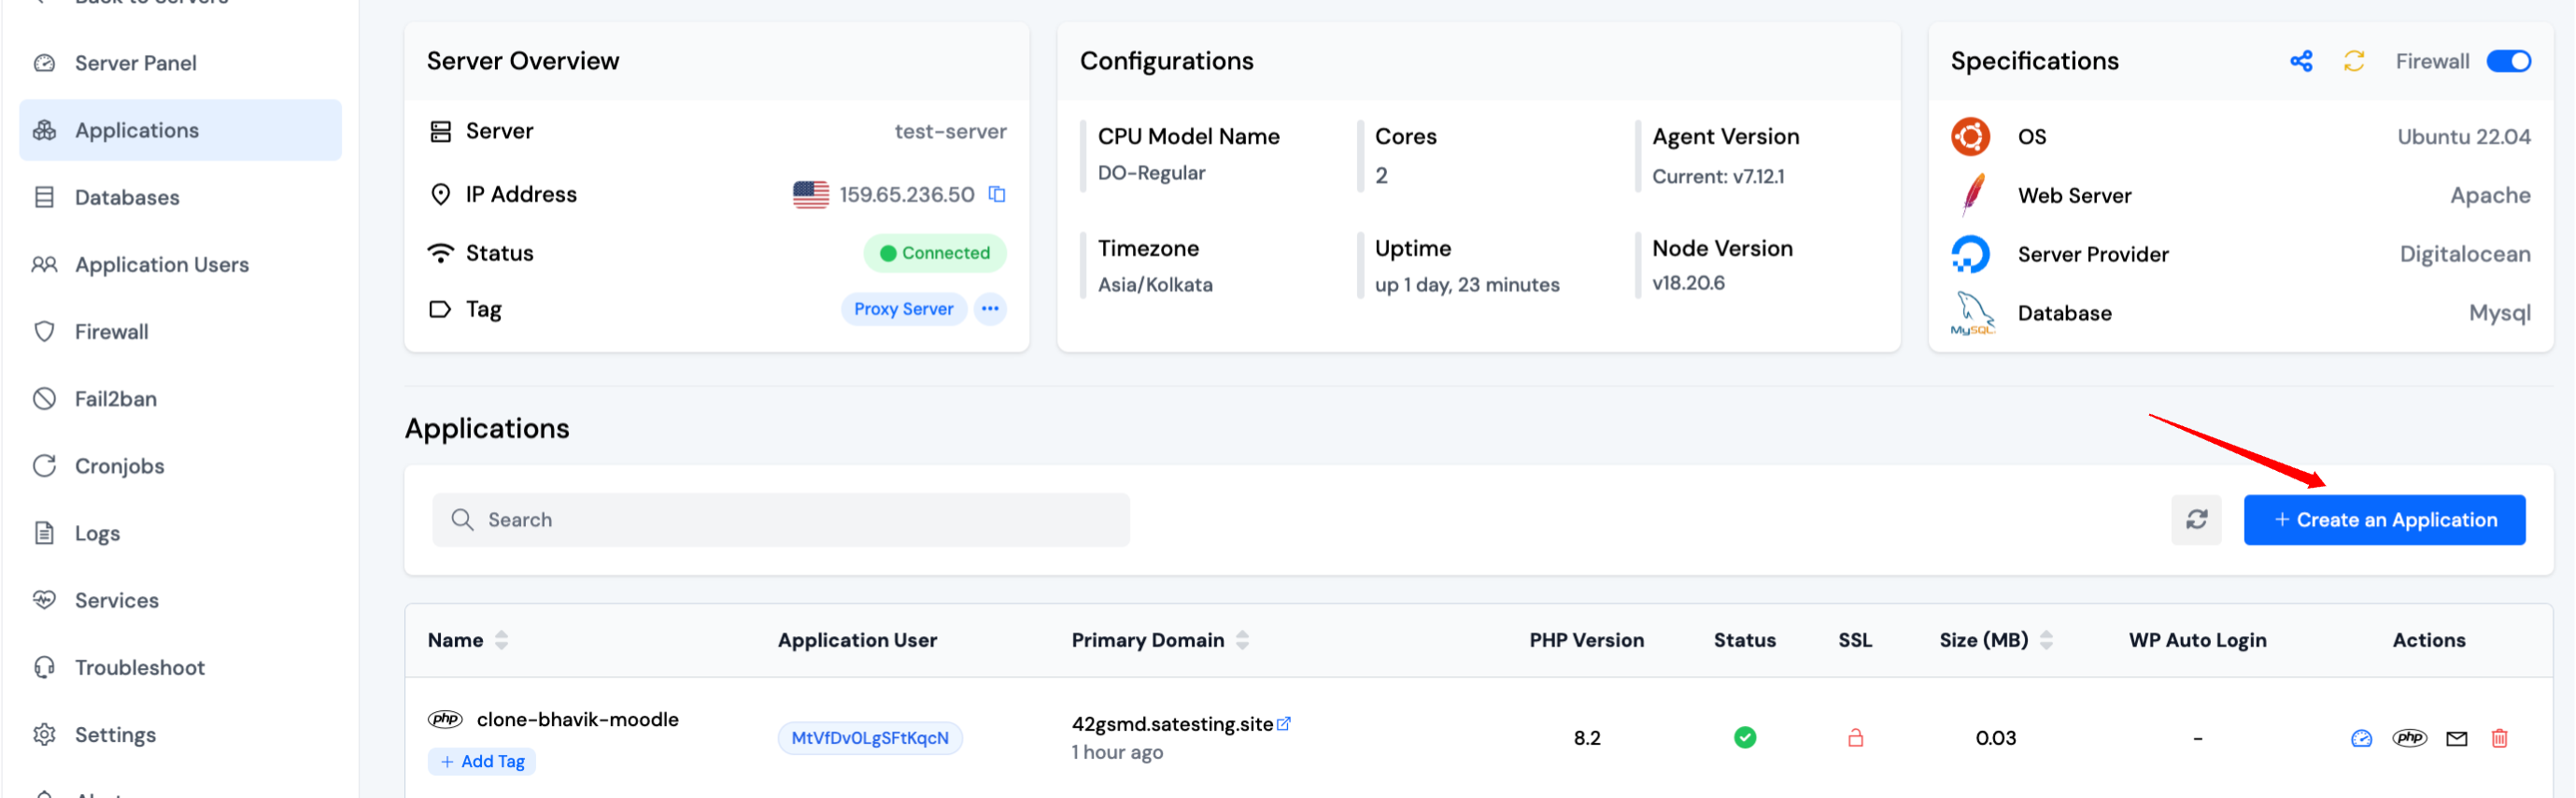
Step 1: Log in to your ServerAvatar account and open the Server Dashboard for the server where you want to create the application.

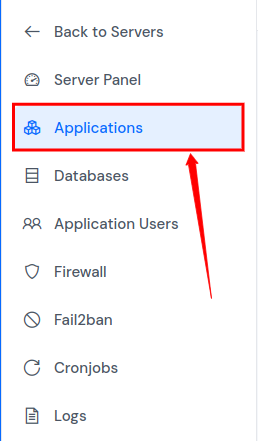
Step 2: In the server panel sidebar, click Applications.
Step 3: On the Applications page, click Create in the top-right corner.
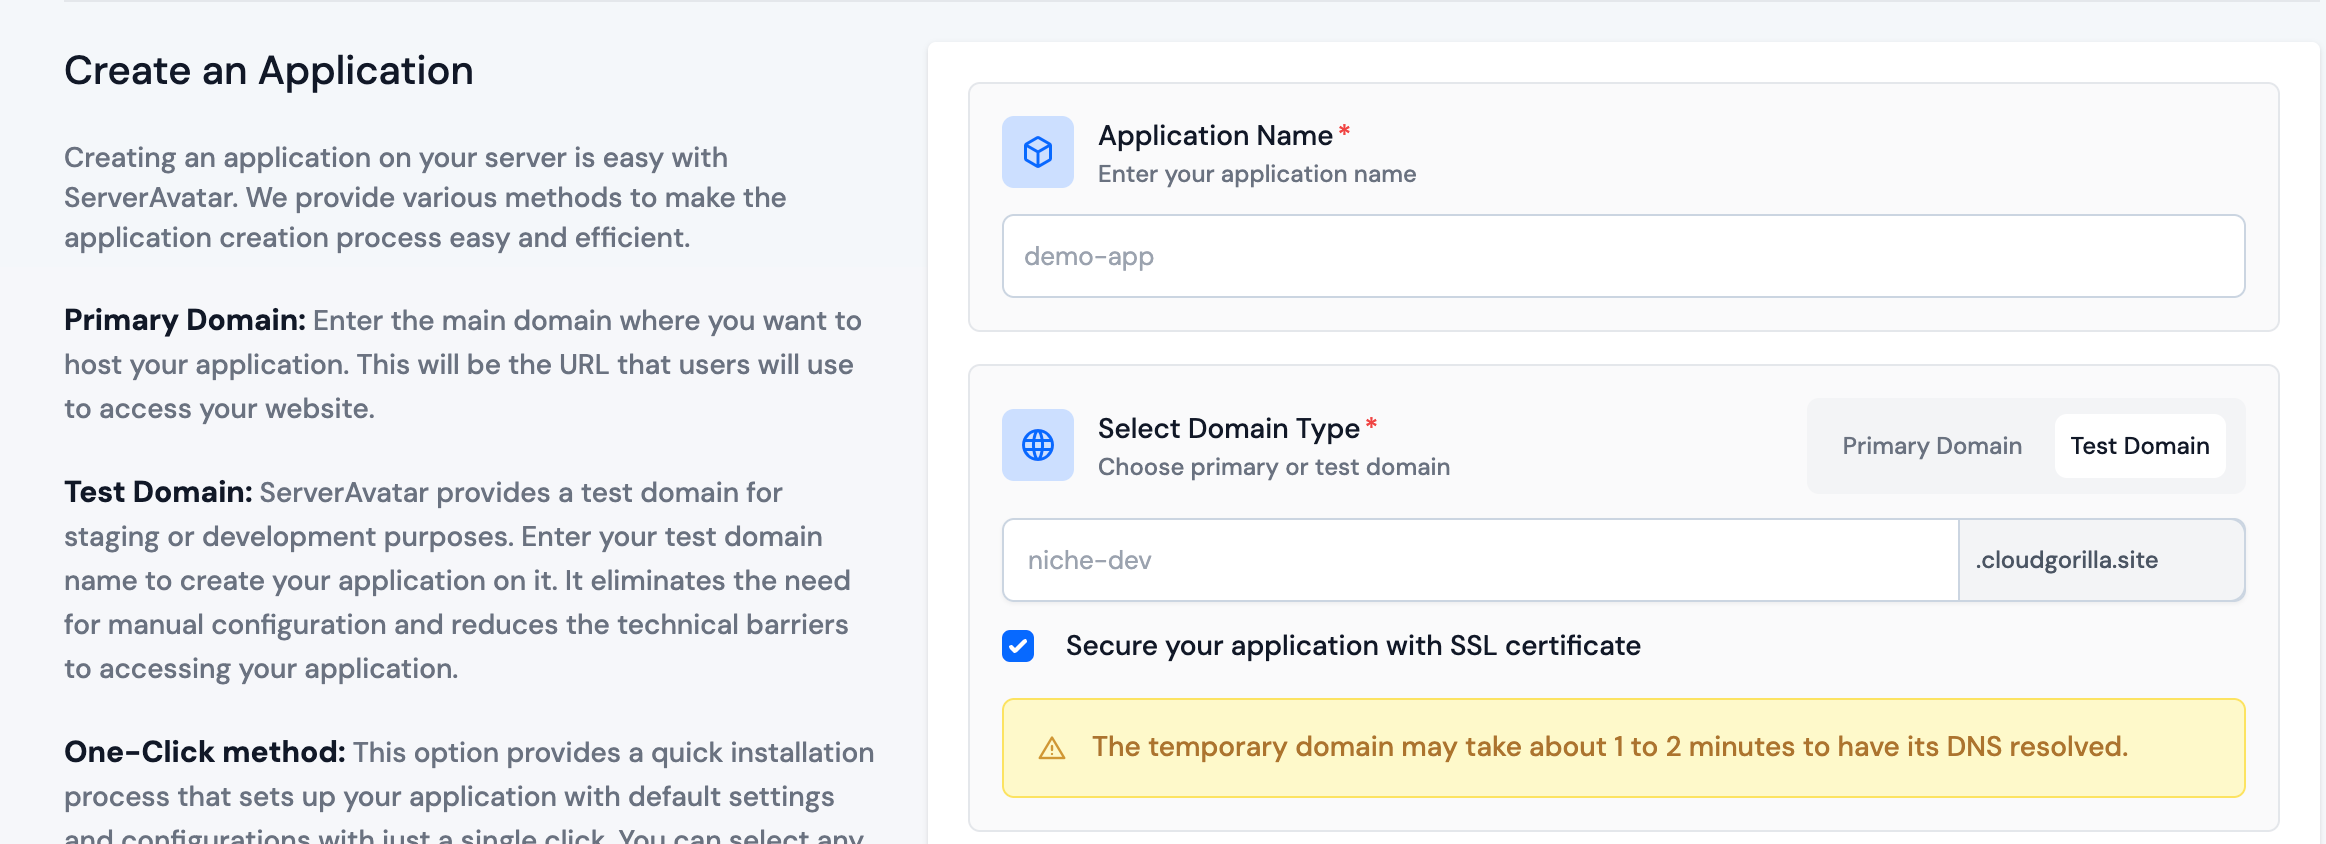
Step 4: The Create Application screen opens. Complete the sections below in order.
Step 5: Basic Details
- Enter the application name in Application Name.
- In Domain, choose a primary domain or a test domain. You can switch a test domain to a primary domain later.
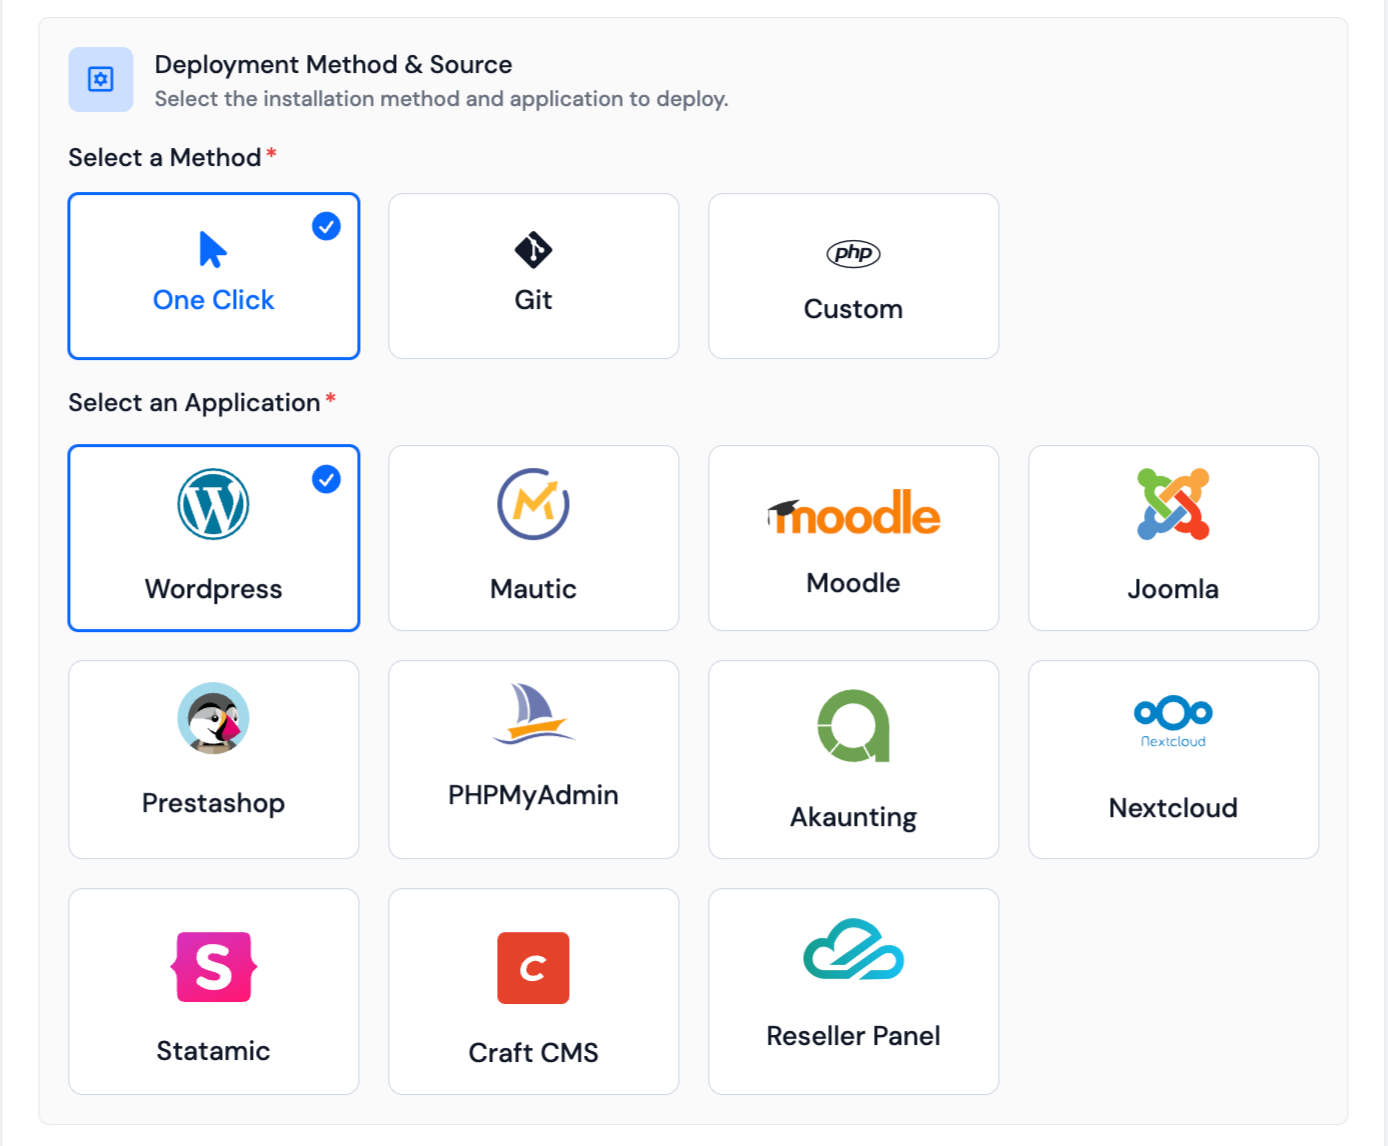
Step 6: Application
- Select One-click as the deployment method and choose WordPress.
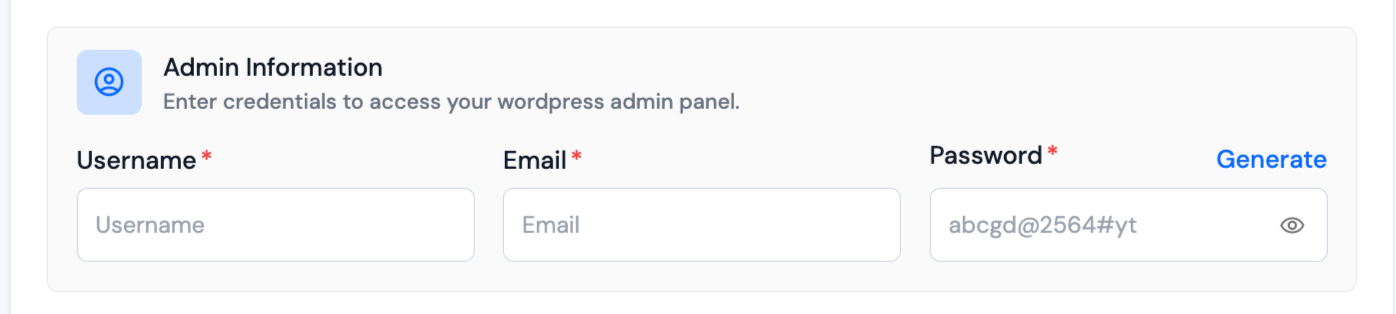
Step 7: Admin and site settings
- Enter the WordPress admin Username, Email, and Password.
- Optionally set Site Title, Site Language, Timezone, and database details before you submit the form.
Step 8: WordPress Search Indexing
- Use Enable Search Indexing to allow search engines to index the site.
- Enable this for live sites. Disable it for staging or test environments.
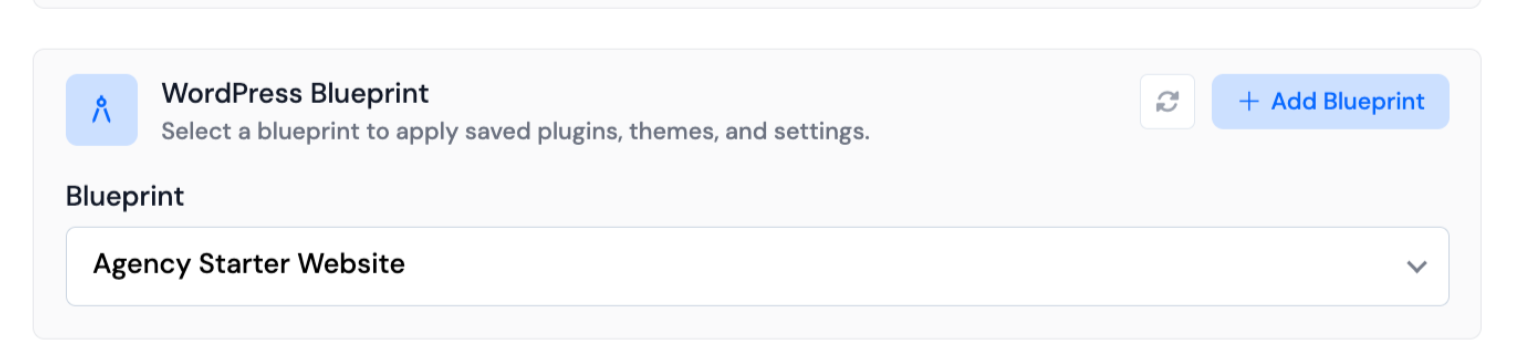
Step 9: WordPress Blueprint (WordPress Toolkit)
- If you have the WordPress Toolkit add-on, a WordPress Blueprint section appears on the create form.
- Use the Blueprint dropdown to select a saved blueprint (optional). Blueprints apply your preset themes, plugins, and site settings when the application is created.
- Click Add Blueprint to create a new preset, or see Apply Blueprint for full steps.
- If WordPress Toolkit is not active on your account, purchase WordPress Toolkit from Add-ons.
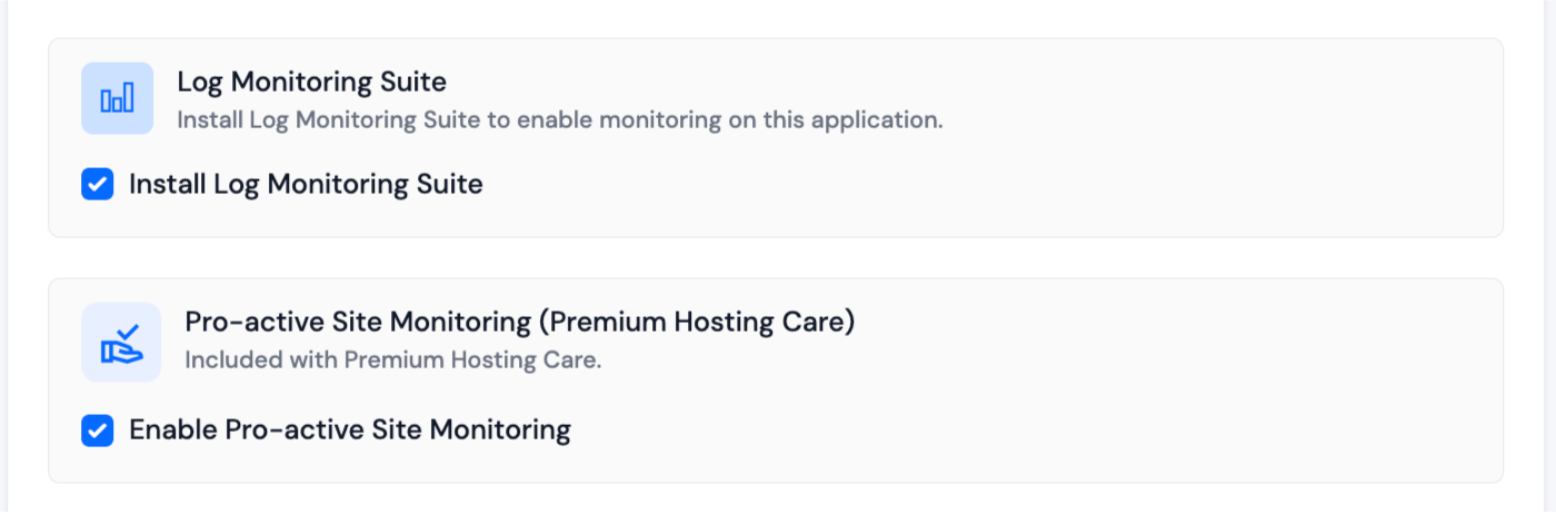
Step 10: Log Monitoring Suite
- If you have purchased the Log Monitoring Suite, enable Install Log Monitoring Suite on this application to view and analyze logs from the ServerAvatar dashboard.
Step 11: Pro-active Site Monitoring (Premium Hosting Care)
- If you have purchased Premium Hosting Care, enable Enable Pro-active Site Monitoring on this application.
- Premium Hosting Care includes priority support, optimization, app-level troubleshooting, proactive monitoring, and a dedicated Slack channel.
- To purchase the add-on, see Premium Hosting Care.
Step 12: Advanced Options
- Click Show Advanced Options for system user, PHP version, and webroot settings.
- Create a new system user for the application or assign an existing one. The system user owns application files and permissions on the server.
- Select a PHP version (ServerAvatar supports PHP 7.2 through 8.4).
- Set a custom Webroot path if needed. The default is /public_html.
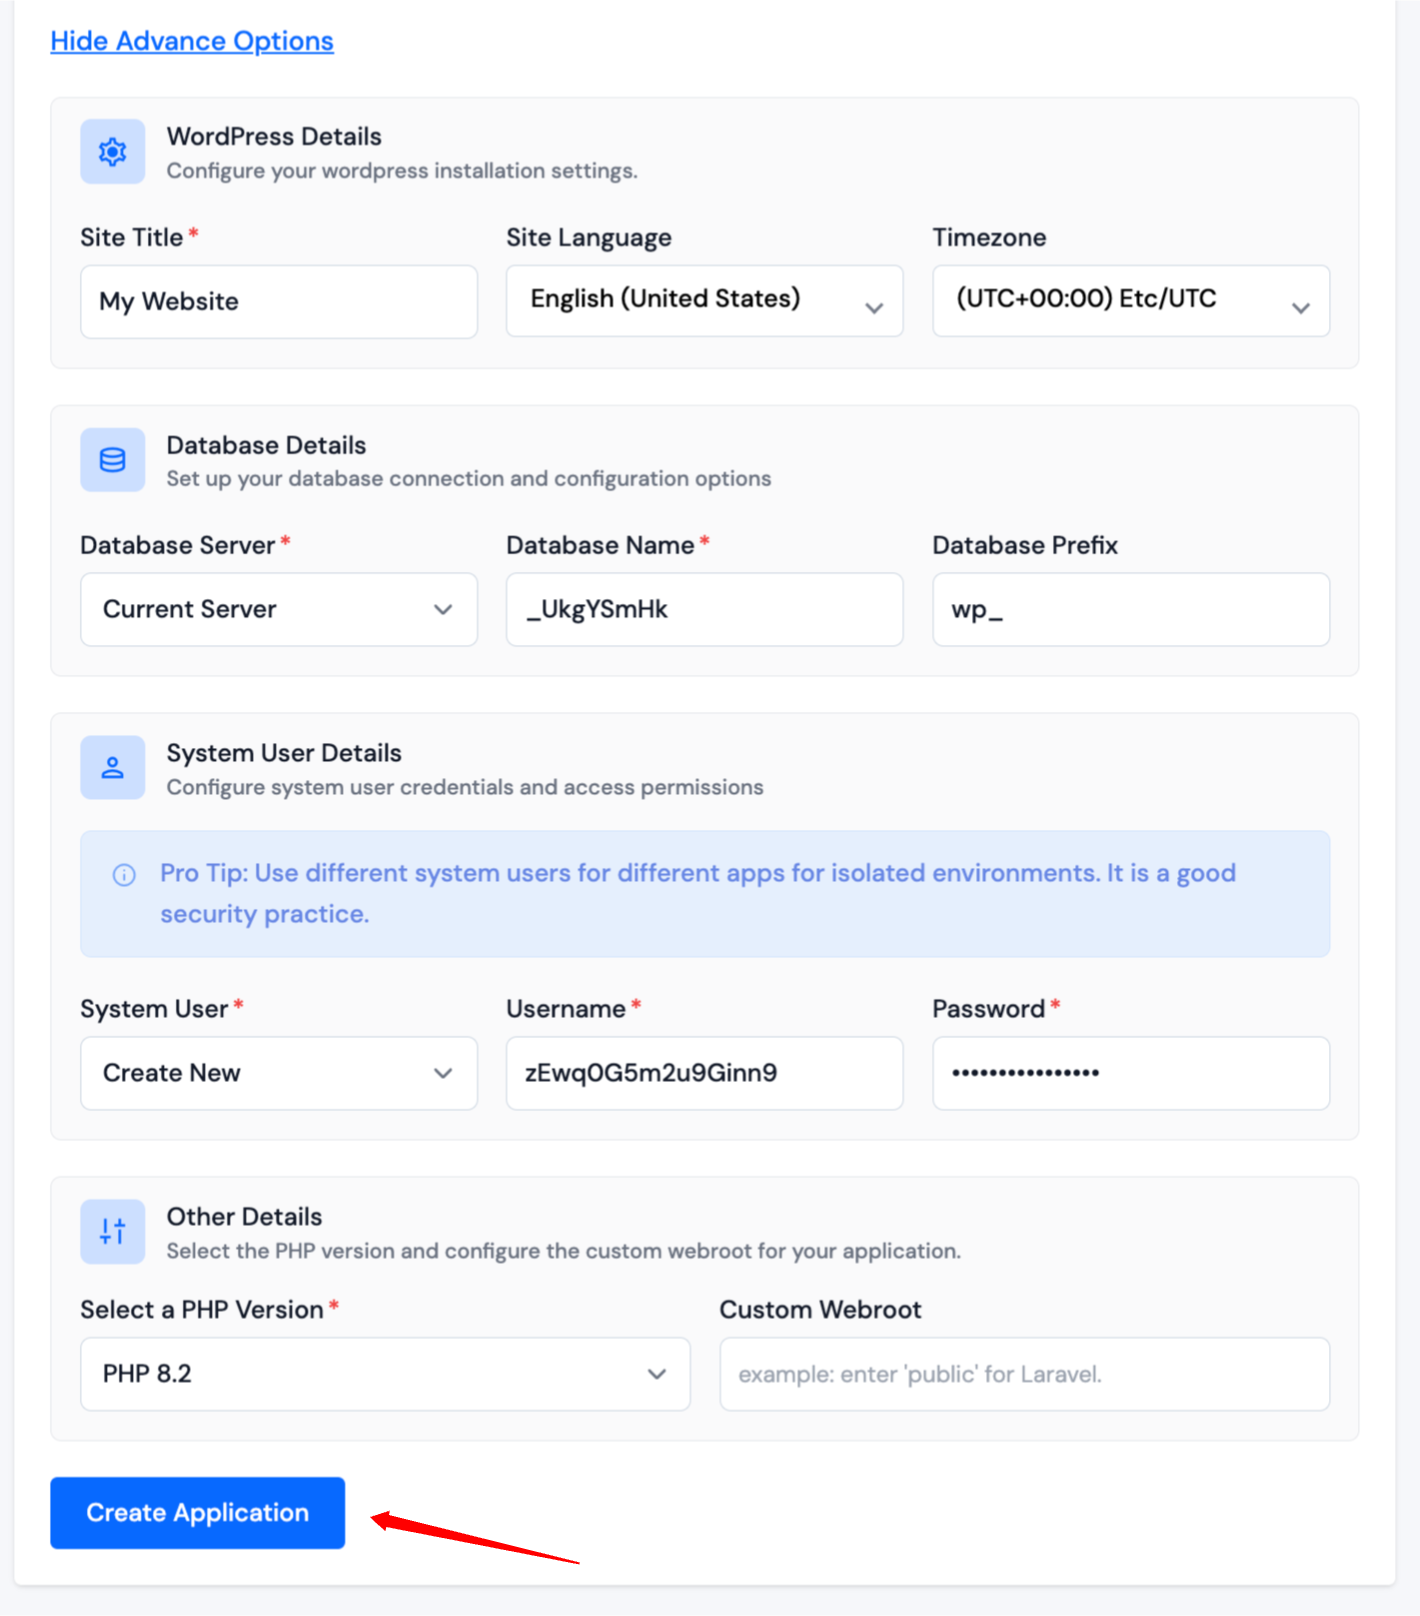
Step 13: Click Create Application to start the install.
ServerAvatar downloads WordPress, installs it on your server, and applies the options you selected. The site is typically live within 10–15 seconds. When installation finishes, you are redirected to the application dashboard.
With WordPress Toolkit active, open WP Toolkit from the application panel sidebar to manage updates, plugins, themes, cron, security, and more. See the WP Toolkit outline.